Choose an ADNS workflow
ADNS first asks you to choose a provider. The path after that choice is conditional: regular providers and custom hostnames lead to activation, while NextDNS leads through sign-in and profile selection before it shows its two mode choices.
Regular provider or custom hostname: Private DNS control
Section titled “Regular provider or custom hostname: Private DNS control”Choose a regular provider or a custom hostname when you want ADNS to control Android Private DNS. This path goes to activation, where ADNS needs the one-time Shizuku or ADB secure-settings grant. It does not require a NextDNS account.
Next steps: Set up the Quick Settings tile for activation, Private DNS control, and tile use; understand permissions before granting access.
NextDNS: sign in, select a profile, then choose how to use ADNS
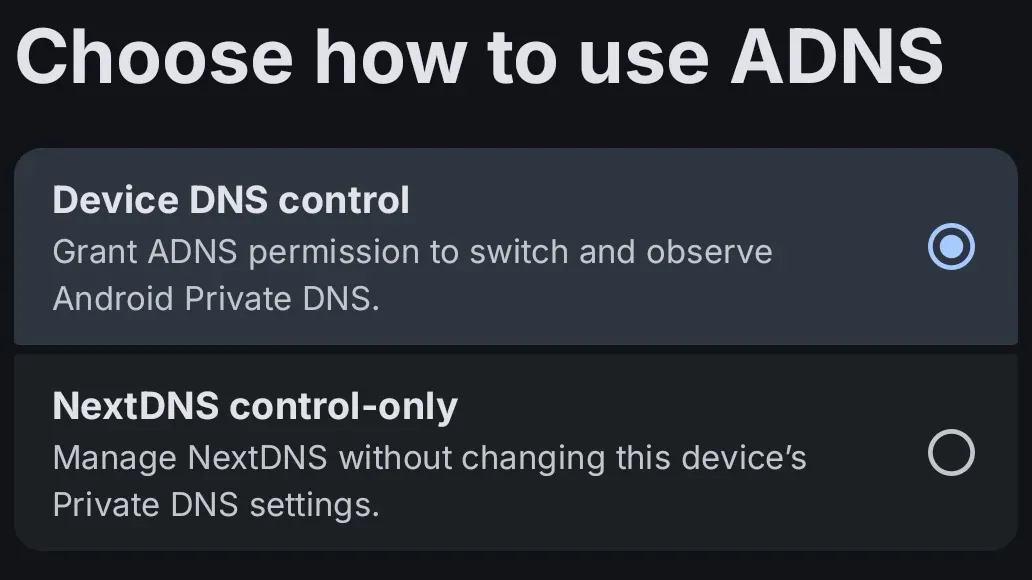
Section titled “NextDNS: sign in, select a profile, then choose how to use ADNS”Choose NextDNS (Recommended) to sign in and select a NextDNS profile. After that, ADNS shows Choose how to use ADNS with exactly two choices: NextDNS control-only and Device DNS control. Those are the two choices shown together in the app; “combined” is only a way to describe the second NextDNS outcome in this guide.
NextDNS control-only
Section titled “NextDNS control-only”Choose NextDNS control-only to manage the selected NextDNS profile without changing Android Private DNS. This outcome needs no Shizuku or ADB activation.
Next step: Connect NextDNS for sign-in, profile, and session details.
Combined NextDNS and device DNS control
Section titled “Combined NextDNS and device DNS control”Choose Device DNS control after NextDNS setup when you want both NextDNS account management and Android Private DNS control. ADNS then continues to the Shizuku or ADB activation flow.
Next steps: Connect NextDNS, then set up the Quick Settings tile for activation and control; understand permissions before granting access.